Here’s the Easy Way to Add Virtual Memory (Swap) to Your Raspberry Pi
Raspberry Pi has a limited amount of RAM and more cannot be added since it is a single-board computer. The Pi 3 has a mere 1GB of RAM. The Pi 4, depending upon the model has up to 8GB RAM. Software applications at times demand more memory. Most of the time this memory requirement is a brief spike. When this happens, the Raspberry Pi will either “freeze” or “crash” due to the limited memory. The crash might also lead to the SD card becoming corrupted, resulting in data loss.
To avoid the possibility of a crash, virtual memory in the form of swap can be configured on the Pi. The right amount of it needs to be added on the correct device in order to get the best out of it. The whole process is explained systematically with instructions for various operating systems.

Understanding How Memory Process Works
RAM is the physical memory. On the Pi 4, it is located beside the processor. On the Pi 3, RAM is placed on the bottom side of the printed circuit board. Unlike regular motherboards, RAM on a Raspberry Pi is soldered to the board which restricts the possibility of increasing its capacity.
When a software application is run, it uses a portion of RAM for its functioning. Think of a browser as an example. When a web page is loaded in a tab, it stores the page data in the RAM along with the memory needed to run the browser program. When more tabs are loaded, the RAM is filled up as much. Without virtual memory, at some point the RAM will run out of capacity and new tabs cannot be loaded at all. Browsing the existing tabs will also slow down significantly as there is no free memory for basic operations. At this point, the Pi will stop responding and the only way to bring it back is through power cycling (switching off and on).
![]()
This random shutdown may cause serious issues, especially when the OS is on the SD card. The card might get locked to “read only” state or in the worst case, get corrupted altogether. This is when total data loss occurs.
The impact of “out of memory (OOM)” condition can be minimized by configuring swap to be used as virtual memory. Swap can be set in the form of a file or a partition on the disk and functions as an extension to RAM. When the available RAM has run out, the infrequently used data on it is moved to swap in a process called swapping. In the case of the browser example, this would be data from a loaded tab that is least used. When the tab is activated again, this data will be moved back to RAM to show the webpage.

Swap will bring stability for memory intensive operations. If there is a brief spike in memory consumption, swap will assist to absorb the spike and keep the system functioning instead of ending up in a total freeze.
Choosing the Right Device to Set Up Swap
Swap is essential, but the location and size of swap to be configured is also equally important. Ideally, swap must be on a fast device. Next to the caches on the processor, RAM is the second-fastest memory. DDR4 on the Pi has a bandwidth of 4.4GBps (gigabytes per second). Swap needs to be on one of the other available storage devices.
If an SD card is used for the OS, a small swap area is configured on it by default. You can check its size using the command:

99MBis not a significant amount of swap. It will fill up quite quickly. SD cards have limited write cycles since they use flash memory and excessive swapping could reduce their life. Also, they have low bandwidth of around 50MBps with much lesser 4k file read/write performance which is essential for swapping smaller files.
Hard drives have spinning disks in them. Although reliable, they have higher seek times and are not useful for swapping.
Aninexpensive SSDfor the OS is a reasonably better choice. The wear leveling algorithms reorganize the data from worn out flash cells and prolong its life. On a Pi, SSD bandwidth is around150MBpsand has much better 4k file performance compared to SD cards. The seek speed is good too. But using the same disk for swap and OS bottlenecks simultaneous operation. Since swap does intensive writes, the disk can reach the TBW (total bytes written) sooner than expected, especially on low capacity SSDs.
Ideally the Pi needs its OS and swap to be on different drives, an OS disk and a dedicated SSD for swap. This would give longevity for the OS disk and speed for the swap. Besides, the bandwidth will be available for both simultaneously since they are different devices.
How to Configure Swap on Raspberry Pi Operating Systems
How to best configure this depends on which OS your device is using.
Desktop OS (Raspberry Pi OS, Ubuntu Desktop and Ubuntu Mate)
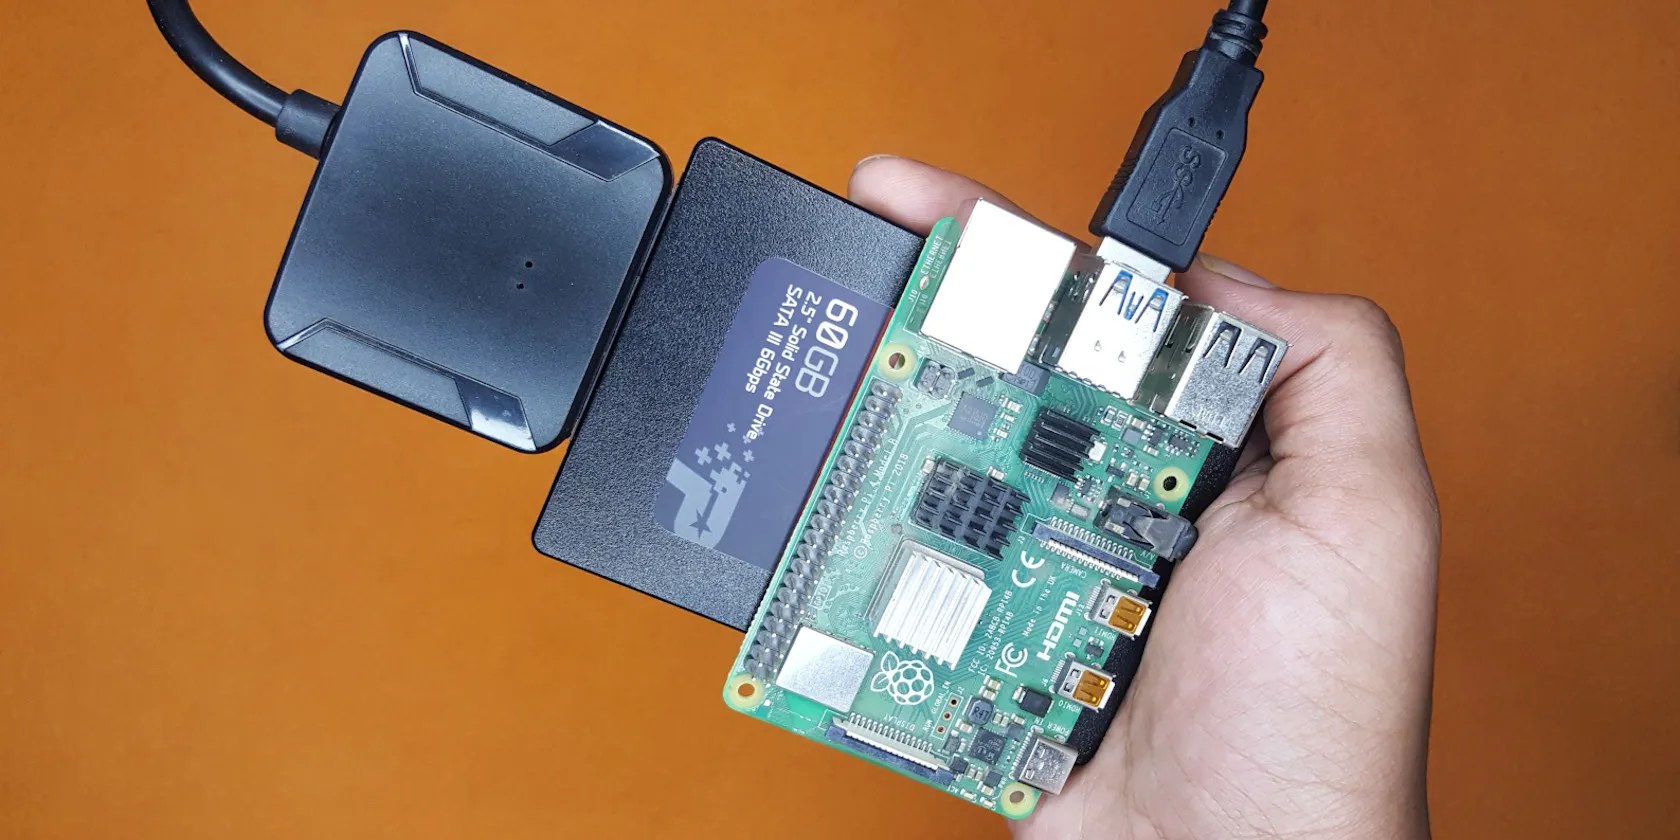
Connect the SSD to be used as swap using aUSB 3.0 to SATA III adapterand start the Pi. The process shown here is implemented on the Raspberry Pi OS and should work equally well on the other operating systems. Incaseyour Raspberry Pi OS needs to be updated, do it.
Install the necessary tool to manage disks using GUI
OpenDisksfromStart > Accessories.
You can also use this command in the terminal to open the tool:
Format the SSD from the menu.
Create a partition using the control with+symbol
The whole partition can be allotted for swap, but a maximum of twice the RAM would be sufficient.
Name the volume and selectOtherfor thePartition Type.
SelectLinux Swap Partitionand create it.
You can mount it right away by clicking the control button with thePlaysymbol. It will mount during this session but will not stick across reboots. It must be set to mount automatically. Click theGearcontrol and selectEdit Mount Options.
ToggleUser Session Defaultsand clickOK. Authenticate and Disks will add an entry to /etc/fstab to mount it at every boot.
Restart the Pi, open the terminal and check the new swap size:
Additional Setting for Raspberry Pi OS Only
Now that the swap is configured on an SSD, the old swap is not needed. You can turn it off by editing:
Set this parameter to zero:
Server OS (Ubuntu, Raspberry Pi OS)
This process is through CLI. For ease, you can prepare the swap partition using the Disks tool on another computer, then attach the SSD to the Pi and boot the server.Connect to the Pi using SSHto proceed.
Find the swap partition:
sda1it is. Find the UUID of this device: sda1
Copy theUUID(unique for you) and edit the fstab file to mount it automatically at every boot:
Add this line:
Save, reboot, and check the swap size:
Optimizing the Use of Virtual Memory for Crash Proof Operation
The configured swap must be put to good use. This is done by setting up a parameter called swappiness. To find the current value:
Set to 60 by default, the value defines how aggressively the kernel swaps out contents from the RAM. It can be set between 1 and 100. The suitable value depends on your specific need. If you see that the Pi is consistently running out of RAM, set it to 100. If not, set it to a lower value. Edit this file to set it:
Add this line at the end:
Caveats of Processing Overhead and SSD TBW
Operating swap requires processing power, usually one of the four cores on the Pi dedicates itself to swapping when RAM is absolutely full.
The general advice floating around is not to use SSDs for swapping, it is true for the case where the OS (along with user data) and swap are on the same disk. It does not apply in this case when swap is set up as explained here. Although the SSD used will ultimately cross its TBW and fail, it can simply be replaced with a new one as there is no important data stored on it with this process.
Swap Advantage for Your Pi
Configuring swap right is a great way to make the Pi crash proof. The stability is due to the fact that overall available memory is a more significant factor than the speed of the memory during OOM. The Pi will not freeze and once the spike usage dips, it will respond quicker again.
Raspberry Pi is a tiny computer with great flexibility. It can be used for different purposes with various lightweight operating systems. Pi 4 serves well as a replacement for regular computers and also an embedded device for industrial use that can run 24x7.
Need to squeeze extra processing power out of your Raspberry Pi? Try one of these lightweight Raspberry Pi operating systems.
Lose your laptop without this feature, and you’ll wish you had turned it on.
You’re not getting the most out of what you pay for iCloud+.
This small feature makes a massive difference.
Obsidian finally feels complete.
It’s not super flashy, but it can help to keep your computer up and running.
